


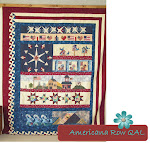
Quilts in the Garden - Final Row
So here are the rules for the last row swap. Note that there will be one more swap in April for the border blocks.
The maximum blocks you can swap this month is 4.
Use a white on white background so everyone's blocks will go together well in the row. Use a green fabric for the grass under the trees and clotheslines. It can be a little bit whimsical like those I have chosen, so you don't necessarily have to use grassy looking fabric.
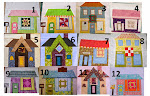
You can make any quilt you want to hang on the line. You can also use the little quilt patterns for the quilt shops from last month if you want. The quilts tend to look better if you put a border around them.
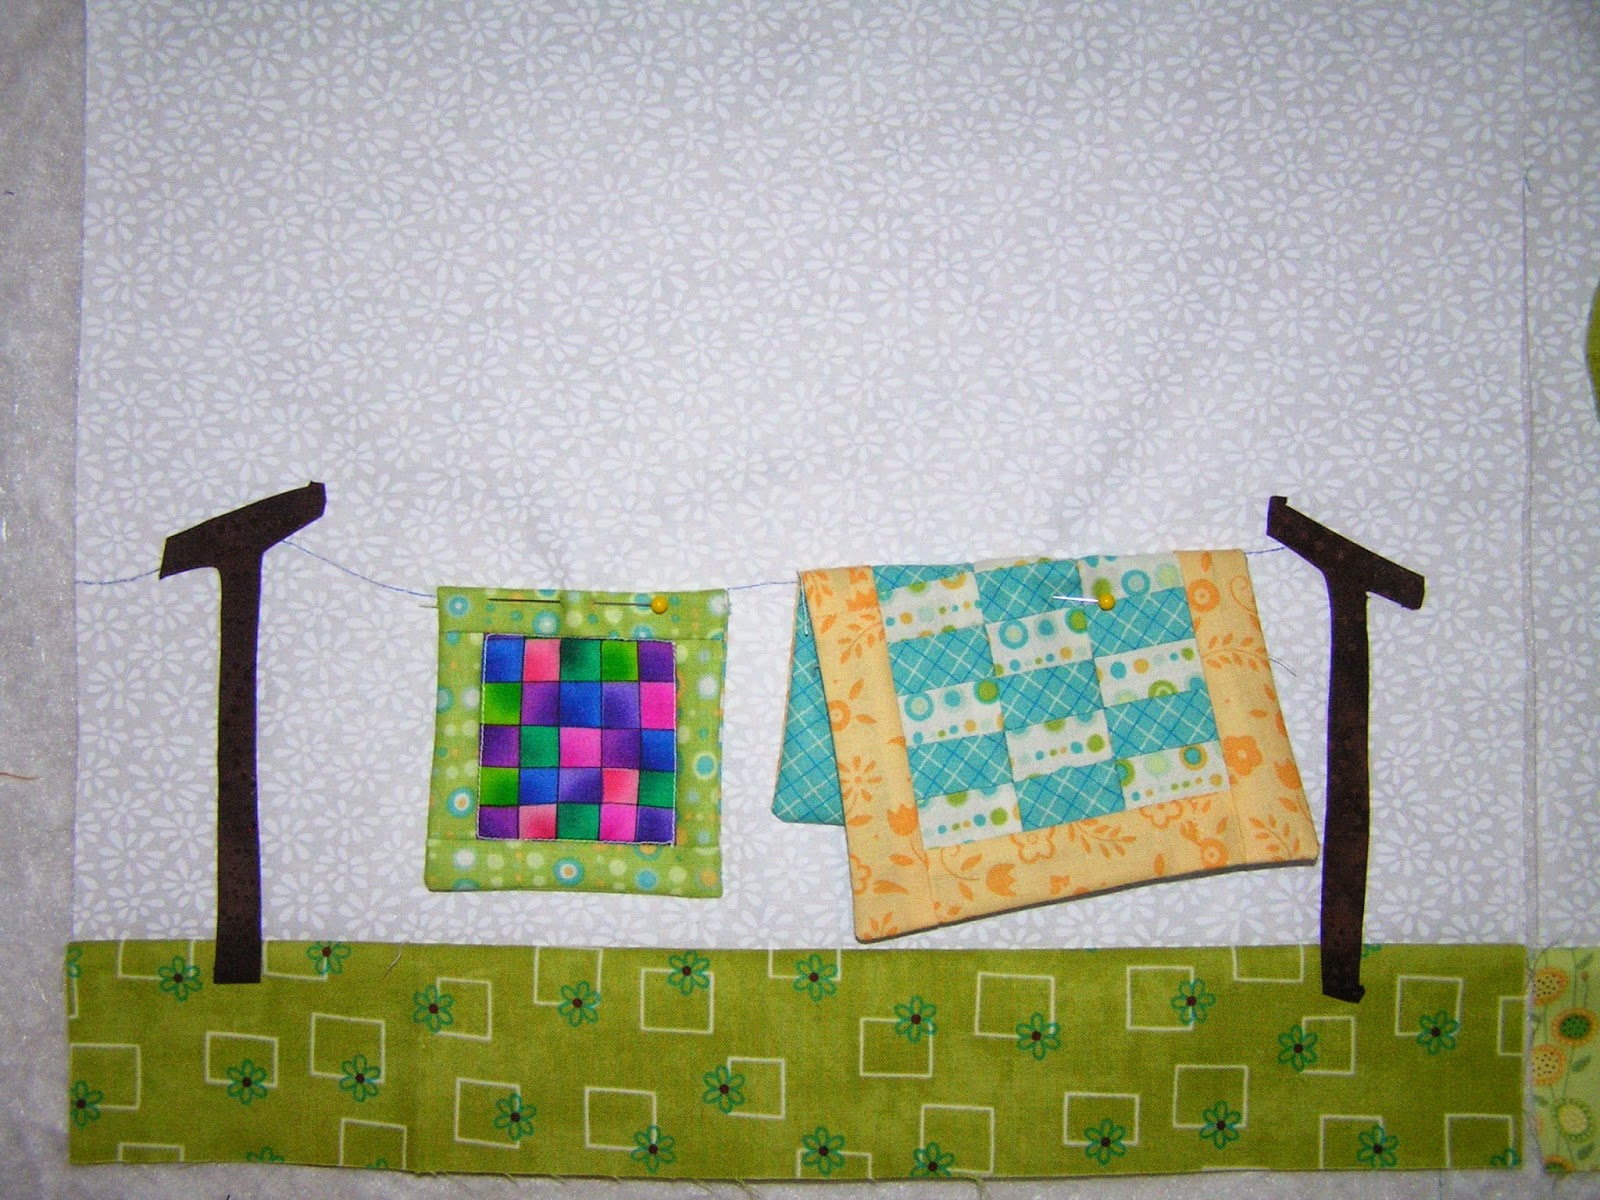
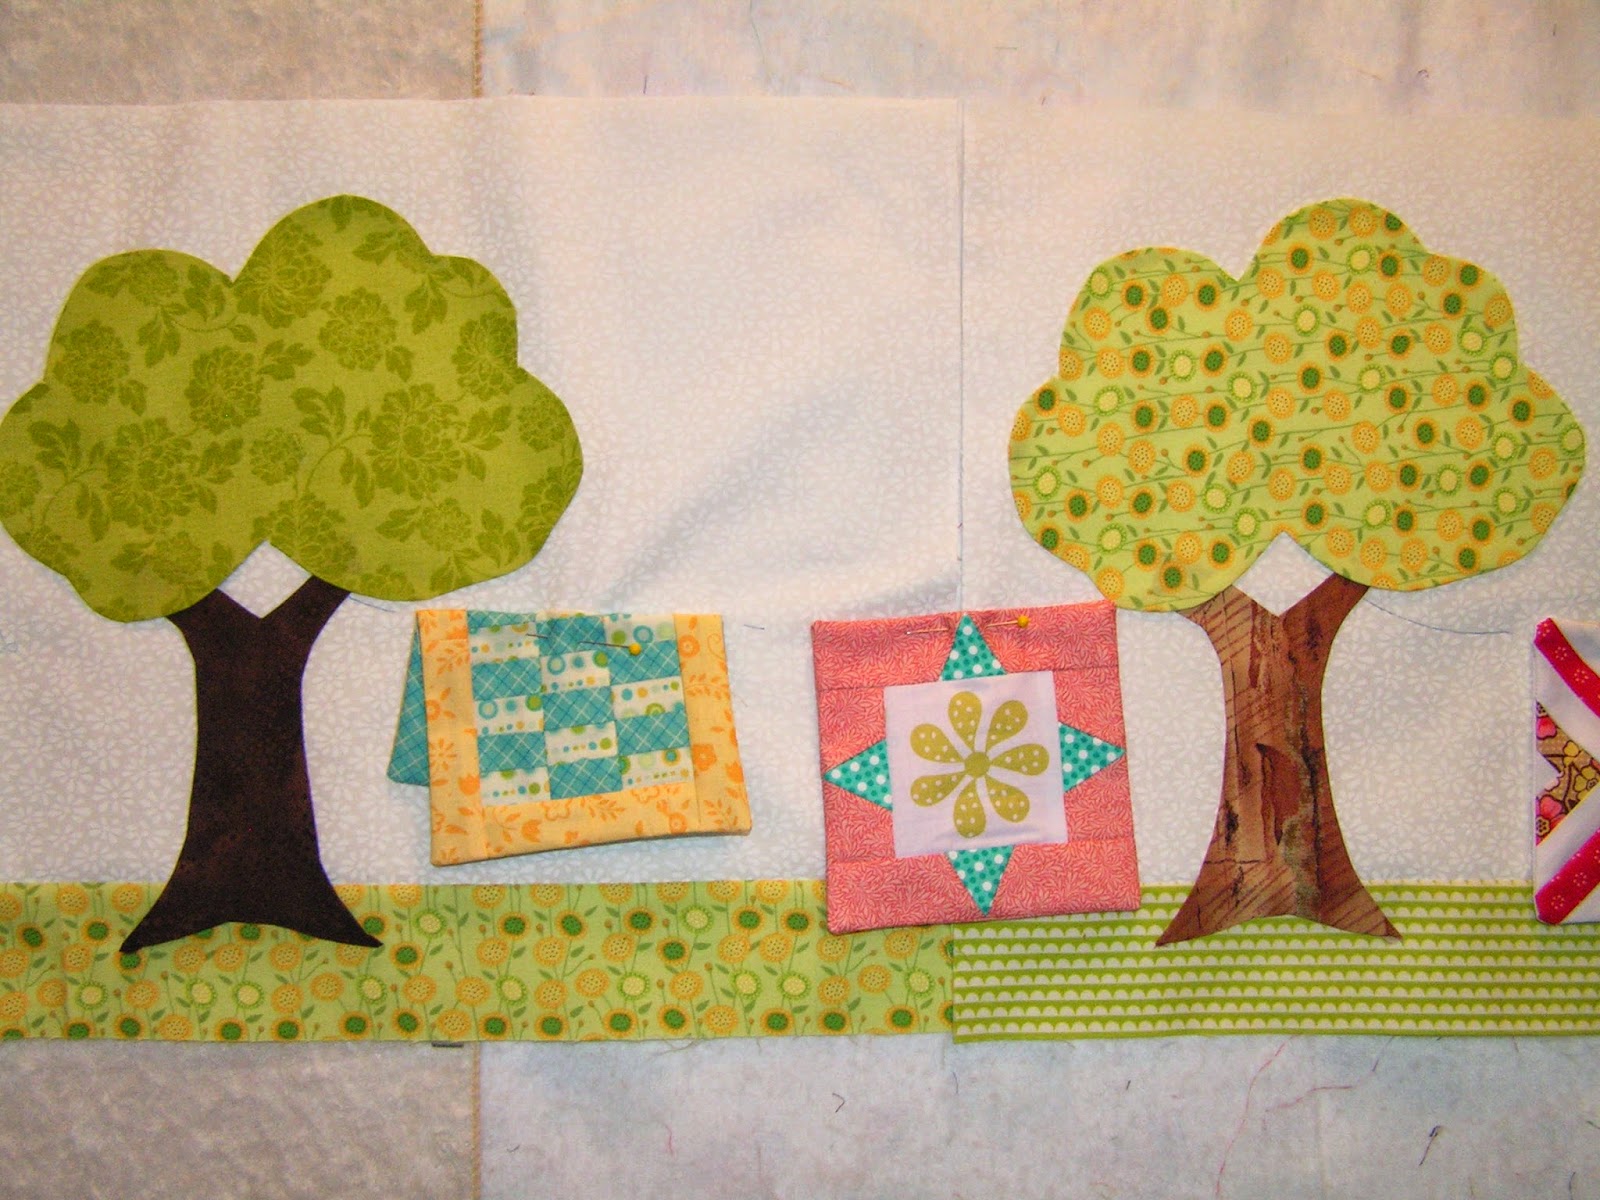
Choose from 3 blocks: clothes line, tree, or fence. The line on the tree block will actually connect to the next block. You can hang as many quilts on the line as you wish, and you may even string two lines between the trees/clothes line poles and layer the quilts.
If you are swapping a clothes line block, attach the quilt for a finished block.
For tree blocks, ALWAYS put the tree on the LEFT side of the block.
If you are swapping a tree block, finish the mini quilt but DO NOT attach the quilt to the tree block because the recipient of the block may wish to string two quilts or center the quilt between the trees/clothes line/fence after she joins the blocks together.
If you are swapping a fence block, size the quilt to fit between the two fence posts in the middle and not so long that it covers the bottom fence rung.
The blocks can go in the row in any order as long as there is a tree on the left of the block in the tree blocks. The other end of the line can attach to a clothes line pole or the pole on the fence.
You can embellish with flowers or anything you want in the garden. I plan to add flowers to mine and maybe a wheel barrow later.


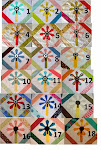
On the photo below, note how the quilt is a touch narrower than the two center posts and you can still see the horizontal poles on both sides. It is ok that the bottom rung of the fence cannot be seen because this placement makes the fence look real. If the fence does not show up well it just looks like a quilt is hanging in space.

On the photo below, note how the quilt is a touch wider than the two center posts but you can still see them. Also, note that the bottom rung of the fence can be seen. This placement makes the fence look more real. If the fence does not show up well it just looks like a quilt is hanging in space.


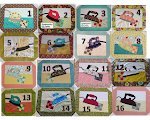
I still need to make two more sewing machines and join blocks together into rows. If you don't see your sewing machine blocks, Ann and Linda, it is because they are in my "Sewing Room Delight" quilt which is finished and quilted.
I have not yet decided the order I want to put the rows in. They are just on the wall randomly for now.


4 comments:
This one looks like so much fun Deana! I will be playing around a lot with the embellishments and placements. Thanks!
Can't wait to get started, what a cute row!!!
Cute quilts and cute row idea. Can't wait to get started.
So adorable! I love your work!
Post a Comment